Installing Windows 7 RC (Build 7100) is similar with the installed Windows 7 Beta (Build 7000) In this test be installed on a virtual computer that is running on SUN VirtualBox 2.2.2 r46594. The คอนฟิก I use virtual RAM 1GB HDD and 40 GB Video memory is equal to 64 MB.
The use of computer hardware for CPU AMD Athlon X2 5600 +, 2.9 GHz, RAM 2GB, Hard Disk 250 GB divided into 2 partition with the files stored on the hard disk virtual partition 2 (formatted as NTFS).
Windows 7 RC System Requirements.
Windows 7 RC Build 7100 is the minimum system requirements:
- CPU: 1 GHz 32-bit or 64-bit.
- Memory: 1 GB for 32-bit version and the 2 GB version for 64-bit.
- Disk space: 16 GB for 32-bit version and 20 GB version for 64-bit.
- Graphics: DirectX 9 and support Windows Display Driver Model 1.0 or higher for use Aero theme.
- Other: DVD-R / W Drive, Internet access (for Windows 7 RC downloads and Update).
Note: System requirements of Windows 7 may be changed from the light version of Windows 7.
Steps to install Windows 7 RC (Build 7100).
Installing Windows 7 RC (Build 7100) with the following steps.
1. when booting the computer with the Windows Setup disc to the screen Windows is loading files and then wait until the work is completed.
2. in the Install Windows window, select the language you want. And other settings. Needs. Finished, click Next to go to the next step.
Choose here:
Language to install: English.
Time and currency format: English (United States).
Keyboard or input method: US.
3. In the next window, click Install Now to start the installation.
4. to read the License Terms window is finished, click the License Terms check box I accept the license terms, then click Next to proceed to the next page.
5. in the window Which type of installation do you want? To choose a Custom (Advanced).
6. in a Where do you want to install Windows? Select the Hard Disk to install. Finished, click Next.
7. the system will start installing Windows, the following will be performed by the Copying files, Expanding files, Installing features and Installing updates after the installation process Installing updates done will restart after restart the system 1 is completed. After Completing Installation step to step Completing Installation will be completed and then restart the system again 1.
8. In the Set Up Windows window, select the User name and name the computer, type the User name you want in the box under Type a user name: Enter the computer to the box under the Type a computer name: Done Click Next.
9. in the window next to Set Up Windows system to set a password for the User name created in step 8 to enter the password 2 times in the box under Type a password (recommended): and Retype your password: and then type. Help remember your password in the box Type a password hint: finished Click Next.
Note:
In Step 9 does not need to set a password. However, to add security to the system. I recommend to set a password. In the event that will require a password to help remember your password data set. System is to allow operations in the next step.
10. in a Type your product key for activation number to enter Product Key (This step is not necessary to enter any options, click Finish Next.
Note: I recommend the Clear check box. Automatically activate Windows when I'm online.
11. in a Help protect your computer and improve Windows automatically, select Use recommended settings or Install inportant updates only, or Ask me later.
12. in a Review your time and date settings to make the Time Zone in the area used by Windows 7 is changed from GMT +07:00 to UTC +07.00 is finished, click Next.
13. in the window Select your computer's current location to the Home network or Work network or Public network.
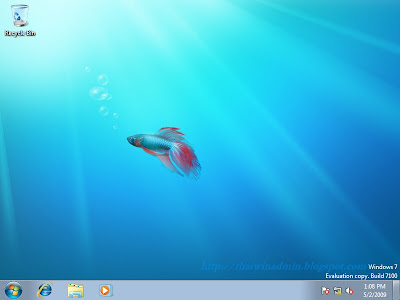
14. Windows will prepare the system settings. Defined in the above steps. When finished it will show the Desktop as below.

Figure 1 Windows 7 RC Desktop
• Windows 7 RC Log on Screen.
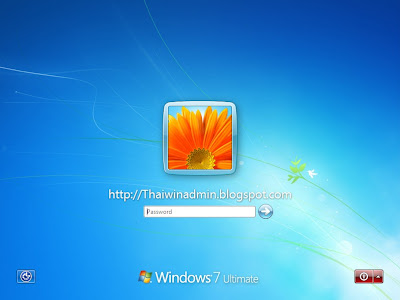
When start the computer using Windows 7 RC Page Log on Screen will have the form below. This version is different from version Beta Build 7000.

Figure 2 Log on Screen
• Version number of Windows 7 RC.
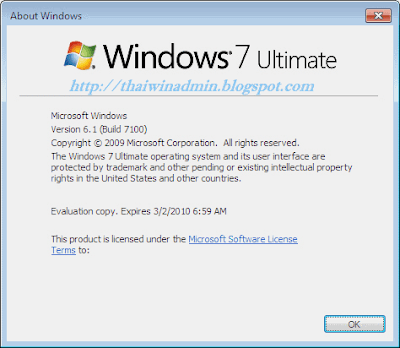
After installing Windows 7 RC finished. Can view the version number by running the command winver.exe (Click Start, type winvwe in the box Search programs and files, then press Enter) when you view the version of Windows 7 Build 7100 version number is 6.1 (Build 7100) and will expire on the 2nd March 2553
Note: If running the ver.exe command at command-prompt, the version number is 6.1.7100.

Figure 3 Windows 7 RC Version Number
© 2009 WFB. All Rights Reserved.
The use of computer hardware for CPU AMD Athlon X2 5600 +, 2.9 GHz, RAM 2GB, Hard Disk 250 GB divided into 2 partition with the files stored on the hard disk virtual partition 2 (formatted as NTFS).
Windows 7 RC System Requirements.
Windows 7 RC Build 7100 is the minimum system requirements:
- CPU: 1 GHz 32-bit or 64-bit.
- Memory: 1 GB for 32-bit version and the 2 GB version for 64-bit.
- Disk space: 16 GB for 32-bit version and 20 GB version for 64-bit.
- Graphics: DirectX 9 and support Windows Display Driver Model 1.0 or higher for use Aero theme.
- Other: DVD-R / W Drive, Internet access (for Windows 7 RC downloads and Update).
Note: System requirements of Windows 7 may be changed from the light version of Windows 7.
Steps to install Windows 7 RC (Build 7100).
Installing Windows 7 RC (Build 7100) with the following steps.
1. when booting the computer with the Windows Setup disc to the screen Windows is loading files and then wait until the work is completed.
2. in the Install Windows window, select the language you want. And other settings. Needs. Finished, click Next to go to the next step.
Choose here:
Language to install: English.
Time and currency format: English (United States).
Keyboard or input method: US.
3. In the next window, click Install Now to start the installation.
4. to read the License Terms window is finished, click the License Terms check box I accept the license terms, then click Next to proceed to the next page.
5. in the window Which type of installation do you want? To choose a Custom (Advanced).
6. in a Where do you want to install Windows? Select the Hard Disk to install. Finished, click Next.
7. the system will start installing Windows, the following will be performed by the Copying files, Expanding files, Installing features and Installing updates after the installation process Installing updates done will restart after restart the system 1 is completed. After Completing Installation step to step Completing Installation will be completed and then restart the system again 1.
8. In the Set Up Windows window, select the User name and name the computer, type the User name you want in the box under Type a user name: Enter the computer to the box under the Type a computer name: Done Click Next.
9. in the window next to Set Up Windows system to set a password for the User name created in step 8 to enter the password 2 times in the box under Type a password (recommended): and Retype your password: and then type. Help remember your password in the box Type a password hint: finished Click Next.
Note:
In Step 9 does not need to set a password. However, to add security to the system. I recommend to set a password. In the event that will require a password to help remember your password data set. System is to allow operations in the next step.
10. in a Type your product key for activation number to enter Product Key (This step is not necessary to enter any options, click Finish Next.
Note: I recommend the Clear check box. Automatically activate Windows when I'm online.
11. in a Help protect your computer and improve Windows automatically, select Use recommended settings or Install inportant updates only, or Ask me later.
12. in a Review your time and date settings to make the Time Zone in the area used by Windows 7 is changed from GMT +07:00 to UTC +07.00 is finished, click Next.
13. in the window Select your computer's current location to the Home network or Work network or Public network.
14. Windows will prepare the system settings. Defined in the above steps. When finished it will show the Desktop as below.

Figure 1 Windows 7 RC Desktop
• Windows 7 RC Log on Screen.
When start the computer using Windows 7 RC Page Log on Screen will have the form below. This version is different from version Beta Build 7000.

Figure 2 Log on Screen
• Version number of Windows 7 RC.
After installing Windows 7 RC finished. Can view the version number by running the command winver.exe (Click Start, type winvwe in the box Search programs and files, then press Enter) when you view the version of Windows 7 Build 7100 version number is 6.1 (Build 7100) and will expire on the 2nd March 2553
Note: If running the ver.exe command at command-prompt, the version number is 6.1.7100.

Figure 3 Windows 7 RC Version Number
© 2009 WFB. All Rights Reserved.
Comments
Post a Comment